Mini Box/Ornament made using the pattern found here. Poinsettia stamp is from MC-8 (Christmas Flowers) and Snowman stamp is from MC-53 (Teeny Weeny Christmas).
Showing posts with label Ornament. Show all posts
Monday, November 24, 2014
Wednesday, November 7, 2012
Before You Put Your Halloween Stamps Away...
Here are a couple of ideas to take our Halloween cling set MC-27 (Pumpkin Kitty)...
through Thanksgiving...
and into Christmas...giving you the most bang for your buck!!
Click here for a simple pattern for this ornament/frame.
Stamps Used: "Thankful" and leaves: MC-7 (Thanksgiving)
Pilgrim Hat: MC-30 (Happy Thanksgiving)
Holly: MC-8 (Christmas Flowers)
Santa's Hat and Presents: MC-33 (Merry Christmas)
Wednesday, August 25, 2010
Today's Winner is....
Debbie!!! Congratulations, Debbie!!! You know the routine...email your address to me and I'll send the stamps out to you!!! Debbie's comment said that she had ZERO stamps...WHA-T?? Well..I'm honored that Dandelion will be your first stamps, Debbie!!!
Now, on to today's project. From your comments, it seems like most of you are at least starting to think about the upcoming holidays. With that in mind...here are more ideas for the holidays:
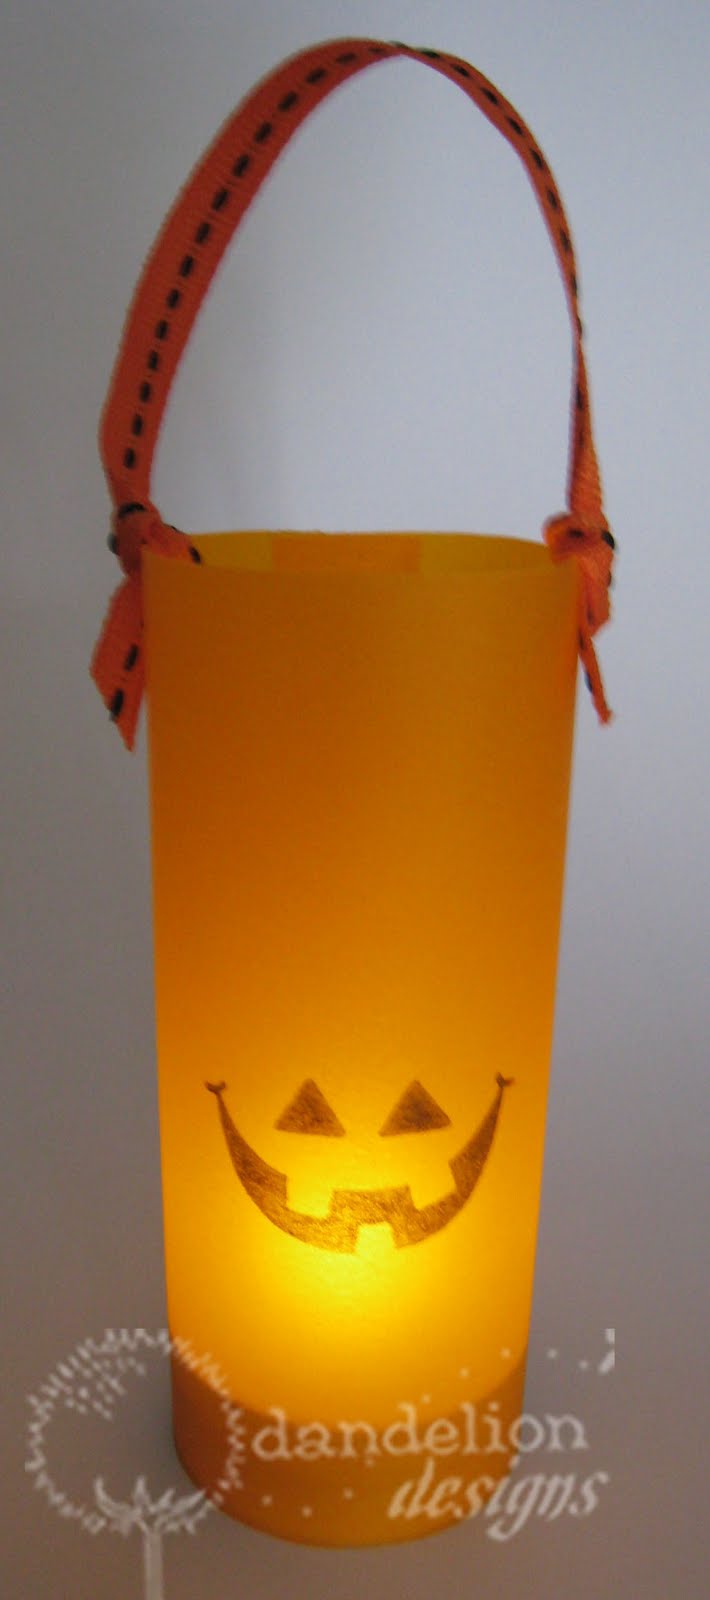
Oh...before I begin...let me share the inspiration behind this project. Everyday when I run my errands, I pass by a house that's surrounded by a fence. Just over the fence, I can catch a glimpse of the backyard with a big mango tree...from the tree, they have a bunch of paper lanterns hanging here and there, at different levels. I don't know why, but it always makes me feel happy to see that. Anyway, here's my attempt to re-create those lanterns using 3 of my new "face" stamps for the holidays:

Can you imagine a bunch of these hanging on your trees leading the trick-or-treaters up to your front door?

Or some of these decorating your home or Christmas tree?

Or some of these as a centerpiece for your Thanksgiving meal?

They're so easy and fast to make!! I picked up the battery-operated candles at Ben Franklin (put a strip of double stick tape around the base of the candle (as shown below):

Cut a piece of vellum (I'm on a vellum kick!!) to 4-3/4" x 3-1/2" (of course, you can change the second number to vary the height of your "lantern"). I don't know if you can see it, but there's also a piece of double stick tape down the length (left side in photo, above) of the backside of the paper. Simply wrap the vellum around the candle (PLEASE, don't use real candles!!) and tape the 2 edges together in the back.
A few extra notes: When working with vellum, I stamp with Staz-On permanent ink and color the image from the backside of the paper. For the turkey candle, I used a handmade mulberry paper instead of vellum. To get the torn appearance at the top of the candle...I simply wet the top edge of the paper (i just put a little line of water with my fingers)...then carefully tear off the edge.
Here's today's giveaway:

To enter the drawing for these stamps, leave me a comment by midnight (Hawaii time) on Thursday, August 26...tell me something that gives you inspiration when you're creating. I'll pick one winner at random and announce their name on Friday, August 27.
Before I go, I wanted to share some goodies I got in the mail from Carole:
Aren't they too cute? She's already used some of my new stamps!!! (I'll be using that Fuzzy Bear in an upcoming project). Can you believe that she created all 3 projects from one sheet of 12 x 12 paper?? Thanks for sharing your creativity, Carole!!!
Have a great Wednesday!!!
Now, on to today's project. From your comments, it seems like most of you are at least starting to think about the upcoming holidays. With that in mind...here are more ideas for the holidays:
Oh...before I begin...let me share the inspiration behind this project. Everyday when I run my errands, I pass by a house that's surrounded by a fence. Just over the fence, I can catch a glimpse of the backyard with a big mango tree...from the tree, they have a bunch of paper lanterns hanging here and there, at different levels. I don't know why, but it always makes me feel happy to see that. Anyway, here's my attempt to re-create those lanterns using 3 of my new "face" stamps for the holidays:

Can you imagine a bunch of these hanging on your trees leading the trick-or-treaters up to your front door?

Or some of these decorating your home or Christmas tree?

Or some of these as a centerpiece for your Thanksgiving meal?

They're so easy and fast to make!! I picked up the battery-operated candles at Ben Franklin (put a strip of double stick tape around the base of the candle (as shown below):

Cut a piece of vellum (I'm on a vellum kick!!) to 4-3/4" x 3-1/2" (of course, you can change the second number to vary the height of your "lantern"). I don't know if you can see it, but there's also a piece of double stick tape down the length (left side in photo, above) of the backside of the paper. Simply wrap the vellum around the candle (PLEASE, don't use real candles!!) and tape the 2 edges together in the back.
A few extra notes: When working with vellum, I stamp with Staz-On permanent ink and color the image from the backside of the paper. For the turkey candle, I used a handmade mulberry paper instead of vellum. To get the torn appearance at the top of the candle...I simply wet the top edge of the paper (i just put a little line of water with my fingers)...then carefully tear off the edge.
Here's today's giveaway:

To enter the drawing for these stamps, leave me a comment by midnight (Hawaii time) on Thursday, August 26...tell me something that gives you inspiration when you're creating. I'll pick one winner at random and announce their name on Friday, August 27.
Before I go, I wanted to share some goodies I got in the mail from Carole:
Aren't they too cute? She's already used some of my new stamps!!! (I'll be using that Fuzzy Bear in an upcoming project). Can you believe that she created all 3 projects from one sheet of 12 x 12 paper?? Thanks for sharing your creativity, Carole!!!Have a great Wednesday!!!
Thursday, August 19, 2010
Good Morning!!!
Hope you're all having a great Thursday morning!! If you're checking back to see who won our giveaway...the winner for today is Tammy!!!!!! Congratulations, Tammy!!! Please email me at dandelion.designs@hawaiiantel.net with your address and I'll mail the stamps to you pronto!!!
For the rest of you...stick around...there are more stamps to be won!!
Today's new stamp is featuring Buddy, the monkey. Whenever I can I like to create stamps that can be used for the holidays, but also throughout the rest of the year. That was the thought behind this stamp called, Buddy's Star. In the photo below I made a shadow box/gift card holder/ornament of Buddy putting a star at the top of the Christmas tree:

*Note: The other stamp in this project is from a previous release...it's called Christmas Lights (#A112).
And...below, using the same Buddy stamp, I made a card that could be used for graduations, promotions, etc.:

Pretty versatile, huh?
Here are the details for making the gift card/ornament. Real easy!! Cut a piece of cardstock to 3" x 12". Score at 3", 3-1/2", 6-1/2" and 7". Punch out a hole and apply double stick tape, as shown below:

Fold along the scored lines...remove the backing from the double stick tape and attach. The space between the two strips of double stick tape forms the pocket for the gift card (behind the shadow box). It literally takes just a few minutes to put together. How great would that be to get a whole bunch of gift card gifts taken care of in August???
Here's the giveaway for today:

To enter the drawing...leave me a comment by midnight (Hawaii time) on Friday, August 20...tell me what "star" you're reaching for right now. For me, like many of you...it's helping my son get into a great college!!! I'll draw one winner at random and announce their name on Saturday, August 21. Good luck!!!
For the rest of you...stick around...there are more stamps to be won!!
Today's new stamp is featuring Buddy, the monkey. Whenever I can I like to create stamps that can be used for the holidays, but also throughout the rest of the year. That was the thought behind this stamp called, Buddy's Star. In the photo below I made a shadow box/gift card holder/ornament of Buddy putting a star at the top of the Christmas tree:

*Note: The other stamp in this project is from a previous release...it's called Christmas Lights (#A112).
And...below, using the same Buddy stamp, I made a card that could be used for graduations, promotions, etc.:

Pretty versatile, huh?
Here are the details for making the gift card/ornament. Real easy!! Cut a piece of cardstock to 3" x 12". Score at 3", 3-1/2", 6-1/2" and 7". Punch out a hole and apply double stick tape, as shown below:

Fold along the scored lines...remove the backing from the double stick tape and attach. The space between the two strips of double stick tape forms the pocket for the gift card (behind the shadow box). It literally takes just a few minutes to put together. How great would that be to get a whole bunch of gift card gifts taken care of in August???
Here's the giveaway for today:

To enter the drawing...leave me a comment by midnight (Hawaii time) on Friday, August 20...tell me what "star" you're reaching for right now. For me, like many of you...it's helping my son get into a great college!!! I'll draw one winner at random and announce their name on Saturday, August 21. Good luck!!!
Friday, October 16, 2009
Remember Newspaper Hats?
One day I was showing my son how we used to make hats for ourselves using a sheet of newspaper (we were very easily amused back then :)

In the process, it made me think of how I could use it as a rubber stamping project (what doesn't make me think of a rubber stamping project??). Anyway...here is the project I came up with, featuring more of my new Christmas designs:

These 2 guys are my playful panda twins, Ping & Pong! I made these little pouch ornaments that can be hung from your Christmas tree. To start, cut a 6" x 8" piece of paper (don't use cardstock...it's too thick).

Fold your paper in half to form a 4" x 6" piece (as shown left, above)...then fold each corner to center (right, above).

Then fold 1 layer of bottom edge up by 1/2" (left, above)...fold up again (right, above).

Flip your piece over and fold bottom edge up 2 times again. Now open it up (right, above) and bring the 2 opposite corners together (below):

After that, I punched a 1/8" hole in each of the top points...set an eyelet in each one, and then thread a silver cord through both holes.

To win the stamps I've used in this project, leave me a comment by midnight (Hawaii time) on Sunday, October 18...I'll pick 2 winners again...1 at random...and 1 at random from all entries from outside of the United States. Good luck to all...I'll announce the winner on Monday, October 19.
ETA: I forgot to mention...in your comment, please let me know if you're from outside the United States (also what country you're from). Thanks!!! (Berenice, I know you're from Mexico!! :)
Hope to see you tomorrow at Cute Stuff!!!

In the process, it made me think of how I could use it as a rubber stamping project (what doesn't make me think of a rubber stamping project??). Anyway...here is the project I came up with, featuring more of my new Christmas designs:

These 2 guys are my playful panda twins, Ping & Pong! I made these little pouch ornaments that can be hung from your Christmas tree. To start, cut a 6" x 8" piece of paper (don't use cardstock...it's too thick).

Fold your paper in half to form a 4" x 6" piece (as shown left, above)...then fold each corner to center (right, above).

Then fold 1 layer of bottom edge up by 1/2" (left, above)...fold up again (right, above).

Flip your piece over and fold bottom edge up 2 times again. Now open it up (right, above) and bring the 2 opposite corners together (below):

After that, I punched a 1/8" hole in each of the top points...set an eyelet in each one, and then thread a silver cord through both holes.

To win the stamps I've used in this project, leave me a comment by midnight (Hawaii time) on Sunday, October 18...I'll pick 2 winners again...1 at random...and 1 at random from all entries from outside of the United States. Good luck to all...I'll announce the winner on Monday, October 19.
ETA: I forgot to mention...in your comment, please let me know if you're from outside the United States (also what country you're from). Thanks!!! (Berenice, I know you're from Mexico!! :)
Hope to see you tomorrow at Cute Stuff!!!
Wednesday, December 3, 2008
Stocking Box

Here's a little box for tiny Christmas gifts...earrings, money...anything tiny. The actual box part measures approximately 1" x 2". Click here to download the pattern. As usual...cut along the solid lines and fold along the dotted lines...see the photo below:

For the stocking piece, attach two eyelets as shown above. For the box piece, follow fold lines and form a rectangular box. Apply double stick tape to the tabs on the bottom of the box.

Attach the box along the fold line of the stocking piece. I also inserted a 1" x 2" (approximate) piece of paper into the bottom of the box to hide the tabs. Slide a ribbon through the two eyelets to close the box. For the "patches" on the stocking I used a piece punched with a Marvy (yellow) scalloped oval punch. I cut the piece in half lengthwise, and used one half along the top edge of the stocking. I trimmed the other half to fit around the toe of the stocking. I also punched a 1/16" hole on the side of the stocking and threaded a gold cord in case you want to use the box as an ornament. Here's another sample:

Stamps used: #911 (Christmas Bear), #922 (Merry Christmas), #A111 (Snowflake Buddy) and #923 (Happy Holidays). Thanks for stopping by!!!
Wednesday, November 5, 2008
Miniature Clothespins

I decorated these miniature clothespins about a week ago by simply gluing on some stamped images to the clothespins. This first card uses stamp #928 (Bird With Holly...I love using rhinestones for the holly berries!!!!). But since then they've been hanging around waiting for me to do something with them..

Here I'm using the clothespin as part of a money card...click here to download a simple pattern. Just cut on the solid lines and fold on the dotted lines. Cut out a 2-1/2" x 3" piece of cardstock...fold your bill in thirds to fit the cardstock piece...punch out a scalloped circle with a Marvy (pink) punch and fold that piece in half. Fit the bill and cardstock piece between the folded circle and clip the whole thing with your clothespin. Now simply slide the money into the little holder.

This clothespin in simply clipped onto a Christmas tree branch to decorate it!! (stamp #919 - Angel Bear). Before I go...I've been getting a lot of questions about what I use to cut out my images (I know...I get carried away with cutting things out!!) Anyway...this is it:

It's a Fiskars mini detail scissors...and it's the only thing I use!!! It's really small, so it's easy to maneuver around the smallest detail. It's sharp down to the fine tip, so you can snip things perfectly. I've had this pair for probably 7-8 years and I've never had to sharpen them!!! (Boy!! Do I sound like a commercial?). Sorry, I'm not sure who carries it...but, that's what I use!! Hope that helps!!!
Sunday, October 26, 2008
Maddy & Snowman Ornament

Hope you're all having a nice, relaxing Sunday!! It's a rainy, dreary day here in Hawaii...I hope this project adds some brightness to your day!! I picked up some of these clear, fillable ornaments at Ben Franklin (they're actually going to be on sale from October 31 - November 7 at Ben Franklin...just in case you're interested!!!). I cut out a piece of clear acetate (traced around the smaller half of the ornament)...then stamped #A113 (Snowflakes) with Staz-On white ink. I stamped, colored and cut stamp #C110 (Maddy & Snowman), and glued it to the piece of acetate. I also used the Staz-On white ink to stamp more snowflakes to the outside of the ornament. This was actually pretty tricky since the ornament is not a flat surface. What I found to work the best is the watch the inside of the ornament as you're stamping the outside (holding the stamp upside down). This way you can see exactly where the stamp is making contact with the ornament). It also helps to use a slow, circular motion when stamping. I added some glitter glue here and there on the snowflakes...then, glued the acetate to the smaller half of the ornament and snapped the two halves together. I finished it off with a bow and a silver cord to hang it up. Here's a closer look:

Oh! One more thing!!! Remember the card I made from the last post? Using the Sam & Max stamp? I had a bunch of circles on my worktable that I had punched out to make that card...they looked like ornaments, so I decided to make them into gift tags:

Stamps used: #918 (Reindeer) and #925 (Holly). Thanks for stopping by!!!
Saturday, October 4, 2008
Snowflake Buddy

Happy Saturday!! Aren't the weekends great? Well, I'm ready to share the next design in our new Christmas line....Buddy the Monkey with a Snowflake!!! I used a tag rim for the base of this ornament and double stick taped a snowflake punched from a Marvy (blue) snowflake punch. (Of course, I HAD to add the glitter and bling!!!!). Next, I used a pop dot to mount "Snowflake Buddy" in the center of the snowflake. I added more glitter and bling and tied a silver cord (decorated with beads) to the metal rim. Simple!! So, the giveaway for today is the "Snowflake Buddy" stamp along with a set of 3 ornaments pictured below:

Just leave me a comment by midnight on Sunday, October 5 (Hawaii time) telling me about the first time you saw snow (I know this might not be a big deal for people who get snow every winter, but for us here in Hawaii...it's a big deal!!!). I'll pick one winner at random and announce their name on Monday, October 6. The first time I saw snow was when I was 17 years old in Chicago. We went for a conference, and one night when we went down to the lobby of the hotel (at around 10:00 at night) and the snow was lightly falling...all the Hawaii kids ran out on the street to play (the other kids just stared at us from the warm hotel lobby). There really wasn't much snow falling, so we scooped snow off of some parked cars to throw at each other in an impromptu snowball fight!!
Good luck to all!!!
Note: Thanks to the anonymous comment regarding the pattern for "A Sweet Surprise" (4/29/08). Please try downloading it again...it should be working now!!! Thanks for letting me know!!!
Saturday, October 27, 2007
5013 Sample - Ornament

This is a sample that was made for a make-it, take-it at a local craft store. I used stamps 2022 and 5013. The dimensions of the ornament are approx. 1.5" x 1.5" x 1/2". It might be hard to see from the picture since it's taken straight on, but the bear is actually slightly raised from the background. The ladybug portion is stamped on vellum and glued to the ornament.
Subscribe to:
Posts (Atom)