Wednesday, January 30, 2008

Magic Under the Moonlight

Last night my family and I went to see a magic show at the Hale Koa Hotel...Magic Under the Moonlight with Mark Mauricio. It was a really great show!! Those of you living in Hawaii (or planning a visit) should really make an effort to see the show. It was such a fun and entertaining time...we were laughing all night!! The show is every Tuesday night and comes with a buffet dinner...you gotta go and see it!!


Here's a little project I did for a make and take at a local craft store. I like doing little projects that use scrap pieces of paper...there's always a bunch that you don't want to throw away, but they pile up really quickly!! You just need a 2" x 6" strip of paper. Make folds at 1-1/4", 3" and 4-1/4" from the top. The end with the 1-1/4" fold will be the "flap". Use a corner rounder to round out the flap, and put a brad in the bottom/center (Making Memories - mini flower brad).
Cut a 6" piece of ribbon for the strap and attach to the inside of the top fold with double stick tape. Use double stick tape again to secure a Hershey's nugget to the inside of the purse. Then simply stamp, cut and color some images to decorate the flap. For the examples I used #5038 (Little Penguin), #5043 (Peeking Monkey), #5002 (Flower) and #5004 (Rosebud). Use double stick velcro to keep the flap closed.

Saturday, January 26, 2008

Happy Birthday, Ryan!

Just wanted to wish my son, Ryan, a very happy birthday!! He turns 15 today!!! Can't believe how quickly the time has gone by! Happy Birthday, Ryan!!

Also, here's a quick and easy valentine card using stamp #5052 (Koala), #1106 (Happy Heart Day), #4022 (Solid Heart) and #5004 (Rosebud).


Hope you all have a great Saturday!!

Wednesday, January 23, 2008

Don't Put That Pattern Away Yet!

Before you put away the pattern I had on the January 20th post...here's one more idea using the same pattern. Actually, using half of the pattern! Use only the side that looks like a gift tag with a fold line. Cut out a piece of cardstock that is printed on both sides.


Fold at the dotted line and punch a hole. Tie a ribbon and decorate just like the gift card holder. I found that a Ghirardelli chocolate square fits perfectly onto this card!! Use double stick tape to hold the chocolate onto the tag. Then put a piece of double stick tape on the underside of the flap you created and stick that down on the candy wrapper.


Next, I got a 4" x 6" piece of cardstock and simply wrapped it around the candy/tag, and secured the ends with double stick tape in the back. I also used a small circle punch in the center front to make a notch where you can grab the tag and slide the candy out.


Next, I got a 4" x 6" piece of cardstock and simply wrapped it around the candy/tag, and secured the ends with double stick tape in the back. I also used a small circle punch in the center front to make a notch where you can grab the tag and slide the candy out.

Here's one made for Valentine's Day:


Sunday, January 20, 2008

Gift Card Holder


I've been wanting to do a project with gift tags for awhile, but just couldn't come up with an idea that worked for me. This has been going on for weeks. So... last night I'm sitting there with some gift tags in front of me and inspiration struck!!! It's a simple project, but I was happy with how it turned out. It's a gift card holder. I drew up a rough pattern that you can download here.


This works really well with cardstock that's printed on both sides. Just cut on the solid lines and fold on the dotted ones. Be careful on your placement of the pattern, it gets a little confusing as to which side of the paper will be showing.


Start with the piece that has the extra tab. Fold that tab up and glue it down only on the sides. This will serve as the "pocket" to hold your gift card.


On that same piece fold down on the other dotted line. Punch a hole on the pattern using a 1/4" hole punch. You can use this as a guide to punch your hole in the actual card.


Next, fold down on the dotted line on your other piece...and punch out the hole on that one too.
You can now tie a ribbon through each of the holes (I just tied it in a square knot). I also dangled a flower (#5032) from the front flap (the piece with the "pocket") with a jump ring. Now, you're going to fit the two pieces together...make sure you have one flap facing the front and one flap facing the back.


Back view:


Glue down the back flap (this flap is just for decoration...I like the idea of something fun going on in the back of the card!).


I used a small piece of double stick velcro to close the card. I finished off with stamp # 5012 (Happy B-Day) and #4039 (Snail-raised with double stick foam).


Saturday, January 19, 2008

Happy Saturday!


Just felt in a pinky mood last night and came up with this card using # 4010 (Cherries) and 4017 (Script Thank You). I just stamped and colored a bunch of cherries on white card stock. I don't know if you can see it, but I outlined each stamp with a light gray marker to give it more depth. I then glued on a strip of KI Memories Green Tea Bitty Blossoms for contrast. Next, I cut out 1 cherry image and punchd a 1/16" hole near the leaves. I also punched a hole on the bottom of the background. I used a jump ring to dangle the cherries off of the background. I stamped the "thank you" stamp on vellum and anchored it with a flower brad (Making Memories). I then mounted the whole thing on 3-1/2" x 5-1/2" cardstock (Bazzill Bling - Feather Boa), and mounted that onto a card.

Thursday, January 17, 2008

You Make Me Smile!


It's my favorite time of year! The radio said it was 68 degrees this morning, and there's a little nip in the air. I know those of you from colder climates will laugh, but for us here in Hawaii...it's cold! Anyway... here's a card that will, hopefully, warm your heart!


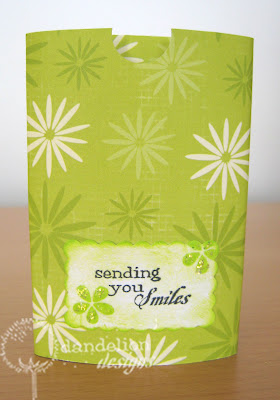
I started with an 8-1/2" x 3-1/2" yellow cardstock. I made 2 folds...1 fold at 2" from the top and 1 fold 6" from the top. I then stamped #5058 (You Make Me Smile) on the green striped paper (sorry, I don't know who makes that paper). I punched 2 small rectangles about 1/2" from the side and tied 2 ribbons through them. Then I glued that to the top section of the card.

I glued some blue cardstock to the bottom section. Next, I stamped and colored #5046 (Turtle With Hat) and punched it out with an oval punch. I used #5030 (Scattered Flowers) as a background. I mounted that onto a scallop oval punched out of Bazzill Bling (Petty Cash) cardstock, and glued that to hang halfway off of the top section of the card. Hope that gives you a little smile!!


Monday, January 14, 2008

A little late, but...


I know a lot of you have probably already made your mini calendars for the new year, but I finally got around to figuring out a project I've been thinking of. My friend, Pam, taught me this fold years ago...but, I changed the size and shape to fit those cute little mini calendars. (You can also use it as a photo frame!!) I'll try to explain it as clearly as I can (I also took a lot of pictures). Ok...here goes!!


Start with a 4" x 5" piece of paper. Fold it in half both lengthwise and widthwise, and then open it up.


Fold each corner down to the lengthwise fold and crease (the sharper you make the creases, the better!).


Flip the whole paper over and fold the 2 flat edges along the center lengthwise fold.


Then, fold the 2 pointed sides down.


Are you following me so far? Ok...next open the whole thing up, with the white side of the paper up.


You'll see a little diamond shape at each corner. Fold that little diamond section in half. So, now you'll see a white sheet with 4 little triangles in each corner.


At the tip of each triangle, you'll notice a fold line. Fold each corner again at this fold line.


At this point there should be 4 remaining fold lines. Fold each side back along these lines.


That's it for folding!! Not too bad, huh? Now you can cut a contrasting/complimentary paper to a 2" x 3" rectangle. Slip this piece into your folded piece and then glue down all the flaps in the back.


Next cut a 3-1/4" x 4-1/2" cardstock and fold that in half. this will serve as your "easel". I punched out another piece of contrasting cardstock with a scalloped oval punch and glued this down at the top of the "easel" and glued the folded frame over that.

I decorated using various stamps and some silver wire. Wow! I hope that made sense!! Please feel free to ask questions if it didn't! Here's a few more samples using the same fold:


Sunday, January 13, 2008

A Valentine Hi


Hope you're all having a great weekend!! Just wanted to post a quick card for Valentine's Day! I'm using stamps #5052 (Koala), #4018 (Monkey) and #4034 (Penguin). I cut out just the top half of each stamp (ouch! sorry guys!) and mounted them on squares punched with a Marvy Super Jumbo square punch...just to make them look like they're popping out. I then mounted the squares on hot pink cardstock and trimmed with a decorative scissors. The paper I used for the heart and middle square are from K & Company - Smitten Pink Paisley. The paper for the other 2 squares are also from K & Company - Smitten Pink Fluorish. The saying (#1109 - Valentine Hi) is stamped on vellum and attached with double stick tape. I glued on some rhinestones and added a ribbon. Very quick and easy!!


Friday, January 11, 2008

You're Sweet


Hooray! It's Friday!! Hope you're able to find a little stamping time this weekend! If you're anything like me, you need to slow down a little to get the ideas flowing...so, remember to take a little time for yourself!


The stamps I used on this card are: #5053 (Peeking Penguin), #5032 (Solid Flower 1), #5033 (Solid Flower 2), #5059 (You're Sweet) and #5031 (Floral Scroll). The paper is from Me & My Big Ideas (DP-05 - Honeysuckle Blue) and the ribbon is from American Crafts (Boutique Blue). If you noticed, I use a lot of Marvy punches...it saves me a lot of cutting time! The penguin stamp and pink flower are mounted on foam dots to give it a little dimension...and I like to have some kind of sparkle in my cards, so I have a rhinestone on the middle of the floral scroll and Stickles glitter glue on the 2 flower stamps. A flower brad finishes things off!!

Thursday, January 10, 2008

Time Flies


The holidays have come and gone and we're already off to a good start in 2008!! A belated Happy New Year to all!!! We've been busy here at Dandelion Designs!!! We've come out with a whole bunch of new designs for Valentine's Day and Easter, as well as some fun, new spring designs!! Hope you get a chance to check them out on our website!


Here's a card I made with stamps #1101 (Mouse on Balloon), #1102 (Happy Mouse), #1109 (Valentine Hi) and #5006 (Daisy). Simply stamp, color and cut out the 2 mice, tie a silver cord around the bottom of the balloon...let that one mouse hang off the cord (I put a drop of glue on his tail to make sure he stays there!). Mount the saying on red cardstock...and add the daisies (with a little bling in the center). The Paper is from Scenic Route Paper Company (Spring Street Floral).


Now that I'm getting into the card making mood, I should be able to post more cards soon (I promise!!) Again, have a great 2008!!!!