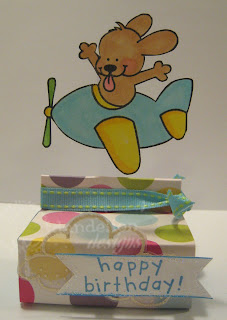
Quick and easy using our new stamps!! Click here to get a pattern.
Showing posts with label Birthday. Show all posts
Showing posts with label Birthday. Show all posts
Saturday, September 23, 2017
Thursday, September 21, 2017
Friday, June 16, 2017
Lollipop Balloons
Turn a lollipop into a balloon...quick and easy!!
Stamps used: Girl stamp is from "Aloha" (CL-17), Flower stamp is form "Never Forget (MC-59) and "Happy Birthday" stamp is a mini stamp #6045. Start with a 3" x 8-3/8" piece of card stock. Score at 3", 6" and 8". Insert the first fold into a hole puncher and punch out a small opening to insert lollipop stick.
Add double stick tape to the tab, a shown below:
Insert the lollipop stick and tape it down to the backside:
Fold into a triangular-shaped stand and secure with the double stick tape. Tie a cord onto the "balloon" and have stamped image "hold" the balloon.
Friday, June 9, 2017
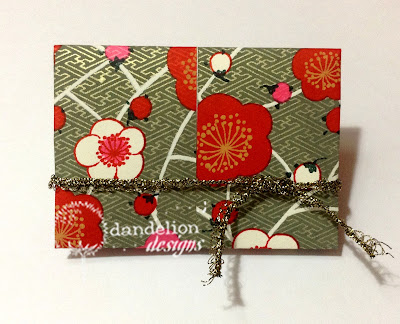
Origami Gift Card Holders
I learned how to make these cute origami gift card holders by looking at a few tutorials then I combined what I liked best into some simple instructions.
Start with a 7" x 10" piece of paper. Fold in half lengthwise and widthwise:
Next fold each edge to the center...widthwise:
and lengthwise:
Open the paper up and fold each corner to the first fold line, as shown below:
Fold each long edge to center line:
Flip paper over and fold both ends to the center. Cut a contrasting piece of paper measuring
3-3/8" x 4-7/8" and fold in half.
Place the insert into the gift card holder, as shown below:
To make a greeting...cut a piece measuring 2-1/4" x 3-1/4"
Sunday, May 28, 2017
Monday, April 24, 2017
Sunday, June 14, 2015
Friday, March 8, 2013
Sunday, February 24, 2013
This & That...
More post-it holders:
Stamps used: Buddy is from MC-5 (So Sweet), flowers and "hello" are from CL-9 (Hello).
Stamps Used: Heart is from MC-15 (Fuzzy Bear 1), "hugs" is from MC-16 (Fuzzy Bear 2) and mouse is from CL-2 (Happy Thoughts).
All stamps for this post-it holder and cupcake (below) are from MC- 4 (Happy Hello).
Have a great night!!
Monday, September 24, 2012
Just a Couple More...
I got stuck on the "floating" pattern from yesterday and had to try it with some other stamps. This time I also added a little box for some goodies. Click here for a pattern.
Friday, January 13, 2012
Candy Apples
I was going through some pictures in my camera and ran across these photos of some party favors I made a few months ago. There's not much stamping involved...just 2 stamps...#4016 (Script Birthday) and the banner is from CL-4 (Happy Hello cling set). Anyway, just thought I'd share...hope you have a great weekend!!!


Thursday, June 9, 2011
Fun Trip Cling Set
Today I'm back to share the project in our new "Fun Trip" cling stamp set:

With summer comes a lot of trips and family vacations...here's a card to send someone off on a grand time:

I was experimenting a little, if you move your mouse over the image you'll see this card in action!! I also did this card as a birthday card. I think it's always harder to make a card for a boy...but, I think this would do the trick:

Just in case you were wondering....I didn't animate this second card (thought I didn't see you try, right?). Well...thanks for stopping by today...check back tomorrow for another project!!

With summer comes a lot of trips and family vacations...here's a card to send someone off on a grand time:

I was experimenting a little, if you move your mouse over the image you'll see this card in action!! I also did this card as a birthday card. I think it's always harder to make a card for a boy...but, I think this would do the trick:

Just in case you were wondering....I didn't animate this second card (thought I didn't see you try, right?). Well...thanks for stopping by today...check back tomorrow for another project!!
Tuesday, October 12, 2010
Trick or Treat
Happy Wednesday morning!! I've been trying to draw some new designs, but nothing has been working out quite right...don't you hate when you're trying to create and that happens?? Anyway...instead of getting frustrated, I thought I'd try to get my creative juices flowing with some stamping. I've been meaning to use my "Little Monster Pals" stamp for a Halloween project. Just by adding stamp #708 (Pumpkin Basket)...they've been turned into little trick-or-treating monsters!! I combined them with my trio of trick-or-treating word stamps to get this:

I used my 2 Marvy tag punches (pink and blue), with a foam dot in between for dimension. Here's a closer look at each panel:


The measurements for this card is 2-3/4" x 6-1/4"...score at 2", 4" and 4-1/4". Of course, you'll need something to put the card in...click here for a simple template for this "flapless envelope/box":

Fold up the card and it slips right in. I kept the outside decorations simple using stamp #701 (Pumpkin) and a place to address the "envelope". Then I got carried away and had to make one using some belated birthday stamps:

I used a Martha Stewart scallop border punch...if you punch out a border, make sure you punch it out first and then measure your card size to 2-3/4" x 8-1/4". Score at 2", 4", 4-1/4" and 6-1/4". Here's a closer look:


With that extra 4th panel, you'll need a little wider box...click here for a template.

ok...it's back to the drawing board for me...wish me luck!!!

I used my 2 Marvy tag punches (pink and blue), with a foam dot in between for dimension. Here's a closer look at each panel:


The measurements for this card is 2-3/4" x 6-1/4"...score at 2", 4" and 4-1/4". Of course, you'll need something to put the card in...click here for a simple template for this "flapless envelope/box":

Fold up the card and it slips right in. I kept the outside decorations simple using stamp #701 (Pumpkin) and a place to address the "envelope". Then I got carried away and had to make one using some belated birthday stamps:

I used a Martha Stewart scallop border punch...if you punch out a border, make sure you punch it out first and then measure your card size to 2-3/4" x 8-1/4". Score at 2", 4", 4-1/4" and 6-1/4". Here's a closer look:


With that extra 4th panel, you'll need a little wider box...click here for a template.

ok...it's back to the drawing board for me...wish me luck!!!
Subscribe to:
Posts (Atom)


